"The lover can see, and the knowledgeable."
—Annie Dillard, "Seeing," Pilgrim at Tinker Creek
Showing posts with label shells. Show all posts

08 October 2010

homework assignment: cross contour of shell

Shell Homework #1

Drawing is due Tuesday, October 19.

Drawing should be executed on Stonehenge or other high-quality drawing paper such as hot-press watercolor paper.

Color of paper: white or any light neutral

Minimum size: 22” x 30”
Optional size: 30” x 40” and/or 38”x 50”

We will use at least four sheets. Buy at least five sheets, so you have one to practice on, especially for ink work.

CROSS CONTOUR
1.     Point of view: shell should be positioned with  a diagonal long axis from front to back (one end should be obviously closer to you than the other end).

2.     Draw the entire shell – be conscious of how you are using the page. The shell should take up as much space as possible on the page without being cropped.

3.     Sketch shell out very lightly, indicating large forms in space and arranging details such as projections and spirals.

4.     One line at a time, trace the form of the shell up, over, around, down. Follow every nook and cranny as if it were part of a landscape. Exaggerate all movement.

5.     No outline. Edge is going to be implied your cross contours.

6.     Every cross contour line you put down should be different than the one before and after. All organic form varies over a given distance.

This includes spaces between lines as well. Vary the amount of space between lines so they are not regular/machine-like.

7.     The drawing should take 5 – 6 hours. Work SLOWLY.
8.     Start light.

9.     Value of line can change to be darker in front and light in back (atmospheric perspective). Do this as you draw – not something you add at the end.

10. Use charcoal, conte, or pencil versions ofeeither. Hard and sharp.

11. Plane changes: each cc line to change direction at least once. This indicates a plane change.

18 September 2010

blind contour, continuous-line contour

During the first full day of class (Tuesday, September 14) we drew from our seashells. The shells will serve as objects from which to work for homework assignments, especially since it is difficult to impossible to arrange life drawing models for homework. Shells make great Life Drawing subject matter: they are bone-like in their hardness and texture and in their concave/convex movements in space. They are also muscle-like in their spiral natures and fluidity. They are easy to hold and move around in one's hand while drawing, as to get a more three-dimensional view of the object.

We started the class with Blind Contour drawings--making drawings looking only at the object, not at the paper. The objective here is to learn how to ignore or subordinate the outcome of the drawing in order to concentrate on the object's form, to learn how to focus intently on the object as your eyes move across it and your arm and hand follow your eye's movement. The goal is not to reproduce a likeness of the shell, although if one observes the shell carefully and draws the contours slowly, there will be a sense of a shell, or a shell-like image on the page, even if it is not proportional or "realistic."

blind contour
blind contour drawing of shell (30 minutes)


The second drawing we worked on was a Continuous-line Drawing of the shell. This time we could look at the paper as we were drawing, but still tried to maintain the careful focus of the blind contour drawing. The rule for this drawing is that we were to keep the feel of a single line moving across the shell and the page. We were to keep our drawing tool in contact with the paper at all times (or putting it back exactly at the point from which we removed it if our arms needed a break). The idea here is that you want to trace the shell's form constantly with your eyes and hand, not skipping over difficult or "boring" parts, but moving along every part of the shell, seeing the ins and outs of the form, and revealing that careful path in the drawing.

continuous-line contour
continuous-line contour drawing of shell (30 minutes)


Students met in small groups after completing these drawings to discuss the qualities and attributes of line in the drawings, and how line was functioning on the picture plane. They described such line characteristics as: value, thickness, angularity, curve, speed, precision, layering, etc. For each drawing, they also had to address the question: how carefully observed was this shell? and what gives that impression?


Enhanced by Zemanta

22 May 2010

student work, spring 2010

Following are drawings from two students' (Jacob Sandstrom & Tyler Haas) final portfolios from Life Drawing I at UW–Stout, Spring 2010.

For more excellent examples from several other students, check out the galleries on flickr: shells, Manikens, gesture drawings, and long drawings. 


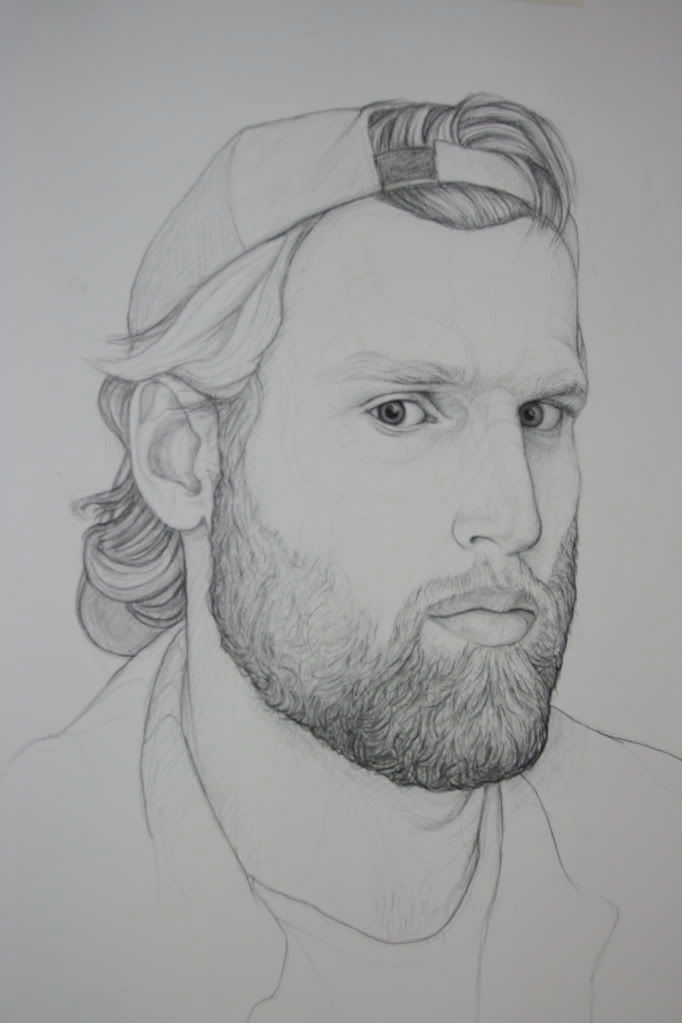
Self Portriatleft: Jacob Sandstrom, Self-Portrait
below: Jacob Sandstrom, Shell with Ink Wash


left: Tyler Haas, Long Pose/Torso Study
below: Tyler Haas, Gesture Drawing
far below: Tyler Haas, Shell Cross Contour


18 September 2009

Homework Assignment, Due Tuesday, Sep. 22

Cross Contour Drawing of Shell

Due: Tuesday, September 22

Spend at least three hours doing a cross contour drawing of your shell--whatever takes that amount of time for you: an entire shell, part of one, more than one, etc.
  • Use a diagonal long axis
  • No outlines
  • Draw larger than life size, fill the paper with your drawing
  • Use conte, charcoal, conte or charcoal pencil (sharpened tool)
  • Use at least 18" x 24" white paper with a 1" margin on all sides
  • Write/sign name on BACK
  • Use value only in the context of line value: darker lines for closer parts of the form, lighter for farther away
  • Use one line (this can be made up of broken, overlapping lines to imply one line) at a time, drawn around the cross-ways of the shell
  • Draw carefully, slowly
  • Be as precise as possible
  • Exaggerate all form changes
  • Draw cross contours over plane changes to reveal 3D form
  • Look for and draw each cross contour line with variety. Each line should be different than the one before and after it.

the country teacher


thought you might enjoy this movie trailer--for the movie itself, but also for the scene where he shows the shell to the students, especially as you work on your first shell drawing.

the country teacher

amelie clavier


check out this artist's flickr photostream for more gorgeous drawings.


RSS Subscribe