"The lover can see, and the knowledgeable."
—Annie Dillard, "Seeing," Pilgrim at Tinker Creek

08 October 2010

field trip scheduled

The Life Drawing I field trip for this semester will take place on Tuesday, November 23.

We will leave from the Loading Dock area of Applied Arts at 9:30 am (come early to get a good seat on the bus!).

We will then head to the Walker Art Center, be there from 11:00 am - 1:00 pm, and then travel to the Bell Museum of Natural History on the University of Minnesota campus.

We will be at the Bell Museum for two hours. While there, you will complete a drawing of one of the specimens. They have many wonderful taxidermy animals, skeletons, bones, and a few live animals.

We will head back to Menomonie at 3:30 and plan to arrive here between 5:00 and 5:30 pm.

Please make arrangements with other faculty and employers so you can be gone from 9:30 am - 5:30 pm on the 23rd.

I will send out an email to other faculty members letting them know why you will be gone, but you should notify them as well, and make up any work you will miss before we go.
Enhanced by Zemanta

homework assignment: cross contour of shell

Shell Homework #1

Drawing is due Tuesday, October 19.

Drawing should be executed on Stonehenge or other high-quality drawing paper such as hot-press watercolor paper.

Color of paper: white or any light neutral

Minimum size: 22” x 30”
Optional size: 30” x 40” and/or 38”x 50”

We will use at least four sheets. Buy at least five sheets, so you have one to practice on, especially for ink work.

CROSS CONTOUR
1.     Point of view: shell should be positioned with  a diagonal long axis from front to back (one end should be obviously closer to you than the other end).

2.     Draw the entire shell – be conscious of how you are using the page. The shell should take up as much space as possible on the page without being cropped.

3.     Sketch shell out very lightly, indicating large forms in space and arranging details such as projections and spirals.

4.     One line at a time, trace the form of the shell up, over, around, down. Follow every nook and cranny as if it were part of a landscape. Exaggerate all movement.

5.     No outline. Edge is going to be implied your cross contours.

6.     Every cross contour line you put down should be different than the one before and after. All organic form varies over a given distance.

This includes spaces between lines as well. Vary the amount of space between lines so they are not regular/machine-like.

7.     The drawing should take 5 – 6 hours. Work SLOWLY.
8.     Start light.

9.     Value of line can change to be darker in front and light in back (atmospheric perspective). Do this as you draw – not something you add at the end.

10. Use charcoal, conte, or pencil versions ofeeither. Hard and sharp.

11. Plane changes: each cc line to change direction at least once. This indicates a plane change.

clay assignment #2: abdominals

abdominals
(due Tuesday, October 12)

quadratus lumborum,
vol. 5: pp. 60-61
make sure you build both triangles of this muscle

external obliques,
vol. 5: pp. 78-79

rectus abdominis,
vol. 5: pp. 72-73
indicate navel and tendinous inscriptions

01 October 2010

visiting artist

 
Pins, 2006.

Sterling silver, steel, magnet wire, and electronic components, 1.5 x 7 x 4.5 inches. 
Kinetic: eighteen steel sewing pins strike the wearer on the neck and vocal tract as she speaks.

Visitng artist Erica Duffy-Voss will give a presentation about her work on Monday, October 4 at 10:30 am in Applied Arts 210.

Duffy-Voss teaches in the Metals area at the University of Northern Iowa. She will be showing a four-screen video installation "stutter"  in the larger of the Furlong Galleries October 4th - November 12.

While the Installation that she is exhibiting is video, her work is quite diverse, and her presentation will include metals, video and sculpture. Her website: 

Erica Duffy-Voss


Enhanced by Zemanta

30 September 2010

blogging questions


If you are having difficulties with blogger, or are wondering how to accomplish certain actions on your blog, you can check blogger help.


For example, find out how to post a picture.


You do not need to "follow" other students per se. Although you can. Following is mostly about using a Feed Reader (such as Google Reader). If you follow someone, their blog updates will show up in your Reader so that you are notified whenever they post something new.


What you do need to do is to make sure as the semester progresses, that you are commenting on at least one other student's blog (from your section of Life Drawing I). You will need to comment at least once on every other student's blog during the semester. You are responsible for keeping track of whose blog you've commented on.


To comment on someone else's blog, first find a blog either on the left or right column (labeled art 301-001 ~ fall 2010 [right column of blog] and art 301-002 ~ fall 2010 [left column of blog]).


Then click on that blog, browse through that person's posts, find something that sparks an interest or question in you and then click on the link that usually says "0 comments," or "3 comments," etc.

You will then be able to post your own comment. Ideally, the other student would then offer a response to you--even something simple such as, "thanks for your comment." 


Blogging is a way to build a community of readers and writers, a way to connect beyond the classroom.


I will spend most of my time looking at the blogs when I grade portfolios. During other times of the semester, my assistant (a graduate student) reads them every week and gives me a report to let me know how you all are doing--if the posts are long enough, thoughtful enough, if you have posted a good-quality image, etc.


Enhanced by Zemanta

28 September 2010

23 September 2010

why life drawing

this article is reposted from Vilppu Store

Why Life Drawing?
"Analyze the model, don't copy the model"

Never Underestimate the Power of
Life Drawing


Master teacher Glenn Vilppu muses on the importance of life drawing in animation.

By Glenn Vilppu
This article first appeared in Animation World News, June 1, 1997.

It always comes as a bit of a shock for students and artists preparing portfolios for animation industry positions that, almost without exception, what the studios first want to see are figure drawings from life. They don't want to see caricatures, cartoons, or copies of the studio's characters. They want traditional, classical figure drawing. 
 
Why traditional figure drawing?
First, let us look at what skills are needed in good animation drawing.


  • At the top of the list is the ability to communicate movement and personality through drawing. By using simple lines an artist should be able to give a figure a real sense of life and individuality, not just an action pose or stereotypical expression.


  • Next on the list is to be able to draw three dimensionally, to make the characters feel like they are not only individuals, but that they exist in a real world.


  • Since the characters we create and work with are products of our imagination, the animation professional has to be able to draw from his imagination.


  • Next on the list is the ability to consistently draw the same character using the same forms, proportions and details in the particular style that has been set for the production.
As you can see, the list is asking for a high level of skill, and we haven't even touched on imagination, story telling and inventiveness yet.


Modern Renaissance Drawing
So, how do you know an artist has these skills?


Figure drawing has been the standard measurement of an artist's skills for hundreds of years, probably from the moment we first started capturing the living world around us. The Renaissance artist was judged by much the same standard as the animation artist is today. The great masters of the past were first story tellers. They had to be able to create figures that the viewers could empathize with so that stories were brought to life with a sense of realism and believability

"Animation drawing is, in essence, the closest thing we have to classical Renaissance drawing today." 
 

The Renaissance artist primarily created figures to fit an ideal of perfection using simple volumes to construct figures. The constructions of Raphael are no different than many model sheets you see for classical animation. In traditional drawing, this is referred to as plastic drawing, or "using synthetic forms". This allowed the artist to create fantastic imaginary worlds peopled with figures, in the most part, drawn from imagination. 
 
The beginning compositional sketches of all artists are more similar than they are different. The goal is the same, to capture the sense of the abstract total.  A compositional notation by the Mannerist artist Tintoretto would fit in quite well with rough layout and story sketches from our current major studios. The artists of the past are the inspiration and yard stick of quality that we still use. 


To draw the human figure well from imagination you must first be able to draw the simple forms of construction -- the sphere, box, cylinder and cone -- from memory, in any position and combination. The famous Flemish artist Peter Paul Rubens said that "you can draw anything using a sphere, box, and cone." These simple volumes are the foundation of good figure drawing, and are the fundamental tools of figure construction. These "tools" not only help you to draw the figure from imagination but to see the forms of the model. 
 

"A portfolio will almost automatically be rejected if the figures inside do not have a clear sense of volume and unambiguous space based on model observation."

 
Form and Technique

It is important to understand the difference between animation drawing and drawing for illustration.


  • As I have already mentioned, in animation we draw almost exclusively from imagination, and hence need to be able to construct a figure from the mind's eye.


  • In illustration, the artist will generally acquire a model or use photographs to work from if needed. The illustrator also only needs the one particular view that he or she is going to use. As such, the training tends to develop a strong ability to copy a model as well as different techniques for communicating the image.
In my Figure Drawing for Animation classes, I am continually telling the students that we don't copy the model. We analyze the model.
As for technique, the animation artist must focus on describing form with as little individual technique as possible. An animation is a collective work from many artists. Each artist's work must blend in with the direction of the total production and not draw attention as an individual style.
 

Gesture sketch by Glenn Vilppu
Of course, another reason for requiring a degree of skill at human figure drawing is that a lot of animation is based upon human characters. The ability to change real forms into animation forms requires knowledge of the former. 

"You cannot draw something if you don't know what it looks like." 

Consequently, an animation candidate's figure drawings must show a fair degree of human anatomy comprehension

Problems while drawing from a human model, bring into question not only the artist's understanding of the figure, but also the ability to be able to follow a model sheet.  As humans, we are so tuned into the subtleties of our forms that a high level of skill and development are needed by an artist to create forms that may seem childish.  In fact, this feat is often the culmination of many drawings of the human figure by a talented artist whose skills have been fully developed. 

Of course, there are many exceptions to the above. We have all seen the success of characters created by artists with very little formal training.  While our industry is better for these exceptions, I personally, would bet my career on my artistic skills while I tried to develop that next Saturday morning superstar.  However, keep in mind that whenever asked a question about a particular drawing, my late friend Don Griffith, the former head of the Disney layout department, would first tell you what he would do, and then he would invariably shrug his shoulders and say, "Its your career!"

Glenn Vilppu teaches figure drawing at the American Animation Institute, the Masters program of the UCLA Animation Dept., Walt Disney Feature Animation, Warner Bros. Feature Animation and Rhythm & Hues Studios. Vilppu has also worked in the Animation industry for 18 years as a layout, storyboard and presentation artist. His drawing manual and video tapes are being used worldwide as course materials for animation students.

20 September 2010

opportunities from UW-Stout Career Services

uw-stout career services, career conference

You have all received an email from UW-Stout Career Services about the upcoming Career Conference (October 5 - 7). This is simply a reminder of that information.

Tuesday, October 5 - Game Design & Development

Wednesday, October 6 - Art (Graphic Design, Interior Design, Industrial Design, and Multimedia Design)
Art Education

How to identify employers looking for your major
Employers Interviewing On-Campus

UW-Stout students have also been invited to attend the Government Job and Internship Fair taking place on Friday, October 22, 2010 from 10 a.m. -3 p.m.

If you would like to meet with a Career Service counselor to discuss this or any other aspect of job searching please call 715-232-1601 to set up an appointment.

19 September 2010

animation road show

great animation blog, resource for those interested in animation

Figure Drawing Design and Invention by Michael Hampton

18 September 2010

blind contour, continuous-line contour

During the first full day of class (Tuesday, September 14) we drew from our seashells. The shells will serve as objects from which to work for homework assignments, especially since it is difficult to impossible to arrange life drawing models for homework. Shells make great Life Drawing subject matter: they are bone-like in their hardness and texture and in their concave/convex movements in space. They are also muscle-like in their spiral natures and fluidity. They are easy to hold and move around in one's hand while drawing, as to get a more three-dimensional view of the object.

We started the class with Blind Contour drawings--making drawings looking only at the object, not at the paper. The objective here is to learn how to ignore or subordinate the outcome of the drawing in order to concentrate on the object's form, to learn how to focus intently on the object as your eyes move across it and your arm and hand follow your eye's movement. The goal is not to reproduce a likeness of the shell, although if one observes the shell carefully and draws the contours slowly, there will be a sense of a shell, or a shell-like image on the page, even if it is not proportional or "realistic."

blind contour
blind contour drawing of shell (30 minutes)


The second drawing we worked on was a Continuous-line Drawing of the shell. This time we could look at the paper as we were drawing, but still tried to maintain the careful focus of the blind contour drawing. The rule for this drawing is that we were to keep the feel of a single line moving across the shell and the page. We were to keep our drawing tool in contact with the paper at all times (or putting it back exactly at the point from which we removed it if our arms needed a break). The idea here is that you want to trace the shell's form constantly with your eyes and hand, not skipping over difficult or "boring" parts, but moving along every part of the shell, seeing the ins and outs of the form, and revealing that careful path in the drawing.

continuous-line contour
continuous-line contour drawing of shell (30 minutes)


Students met in small groups after completing these drawings to discuss the qualities and attributes of line in the drawings, and how line was functioning on the picture plane. They described such line characteristics as: value, thickness, angularity, curve, speed, precision, layering, etc. For each drawing, they also had to address the question: how carefully observed was this shell? and what gives that impression?


Enhanced by Zemanta

17 September 2010

Getting Back to the Phantom Skill

drawing by James McMullan
A New York Times article:
Enhanced by Zemanta

16 September 2010

studio mysteries

nice artistic anatomy posts on this blog:
studio mysteries

image from studio mysteries

new american paintings

UW-Stout Studio Art graduate (and Life Drawing student), Nathan Vernau, is featured on the cover of the current issue of New American Paintings. What a great example of what Stout students can accomplish!! Visit Nathan's website here.

New American Paintings, #89 (cover by Nathan Vernau, UW-Stout gradate)

13 September 2010

add/drop reminders

Tuesday, Sept. 14, the fifth day of classes, is:
  • the last day to drop first quarter classes without mark of “WS”
  • the last day to add first quarter classes and choose CR/NC grade option

Tuesday, Sept. 21, the 10th day of classes, is:

  • the last day to register for semester classes
  • the last day to drop semester classes without mark of “WS”
  • the last day to add semester classes and choose CR/NC grade option 
  • the last day to drop a full semester class and get a full refund
Drop cards must have instructors’ permission and signatures and be delivered in person to the Registration and Records office, Bowman Hall room 109.

22 May 2010

student work, spring 2010

Following are drawings from two students' (Jacob Sandstrom & Tyler Haas) final portfolios from Life Drawing I at UW–Stout, Spring 2010.

For more excellent examples from several other students, check out the galleries on flickr: shells, Manikens, gesture drawings, and long drawings. 


Self Portriatleft: Jacob Sandstrom, Self-Portrait
below: Jacob Sandstrom, Shell with Ink Wash


left: Tyler Haas, Long Pose/Torso Study
below: Tyler Haas, Gesture Drawing
far below: Tyler Haas, Shell Cross Contour


16 February 2010

spinal erectors, abdominals


here is a link (click here) to an earlier blog post on the spinal erectors and abdominal muscles. you should have your spinal erectors well under way and revised by now. we will begin abdominal muscles tomorrow and thursday.


15 February 2010

field trip

 
Our Life Drawing I field trip will be Wednesday, February 24. We are scheduled to board the bus at 9:15 am, outside the Applied Arts building along 13th Avenue, near the loading dock entrance.

We will be going first to the Walker Art Center to view the exhibitions, then to the Bell Museum of Natural History on the campus of the University of Minnesota.

Check out this article (click here)–of special interest to you graphic and multi-media designers–by Brent Gustafson (New Media Designer at the Walker) on the creation of a touch-screen kiosk for the Walker's Benches and Binoculars exhibit, which will be on view during our visit.


While at the Bell Museum, you will each be expected to complete a one-hour contour drawing of the specimen of your choice (the Touch & See room has a great collection of bones, insects, fossils, etc.).


(a photo I took during my last visit to the
Bell Museum of Natural History, from the exhibit,
"Wolves and Wild Lands in the 21st Century")


You can do this drawing in your sketchbook or on your larger drawing paper--but if you use your larger paper you'll want to bring a drawing board along, as well. Bring non-messy drawing tools (graphite pencil, charcoal pencil, conte crayon or pencil, pen, etc.).

You will need to bring something to eat, since we will not have time to stop for lunch. Usually we eat on the bus in between the museums. There is a coffee/snack cart at the Walker, just in case.

We will return no later than 5:30 pm.

Last trip, our bus was equipped with wi-fi, so feel free to bring your laptops along.

Please email me with names and emails of non-Art & Design professors I need to send an announcement to. I will automatically notify all Art & Design instructors.

Enhanced by Zemanta

09 February 2010

exercises for the spinal erectors


watching this video and performing the exercises shown (before, during, or after building the spinal erectors on your maniken) will give an even greater understanding of the muscles. the more body awareness you can create for yourself this way, the quicker you will catch on to what the muscle is like, what it does, where its greatest stress and action occur on the body.

try it!

08 February 2010

visible body


here is the link to visiblebody.com
I have the best luck with the website when I use Safari as my browser.


07 February 2010

line variation and sensitivity

click here to access "Line Variation and Sensitivity," pp. 52 - 65 from Chapter 1: "Essential Skills and Information: What Every Student Should Know About Drawing."

Drawing Essentials: A Guide to Drawing from Observation
Oxford University Press, New York, 2009
by Deborah Rockman


04 February 2010

gestural expression

Experienced artists, even before they ask themselves, "What does the subject look like?" ask,
 "What is the subject doing?"
That is, how does the arrangement of the major parts of the figure, the flower, the lamp, or the landscape allude to movement? What suggestions are there in the subject of directed energies coursing through its forms? For virtually everything we see implies some kind and degree of moving action. Such actions are inherent in the subject's formation and structure. The gentle curve of a tree limb or a human one, the forceful thrust of a church spire or a schooner, the graceful spiral of a staircase or a seashell, all these suggest moving actions–types of animated behavior; in other words, they all disclose some kind of gestural expression.
–Nathan Goldstein, The Art of Responsive Drawing, Chapter 1, "Gestural Expression," page 3.


image:Rembrandt Van Rijn (1606-1669), Saskia Asleep, Pen, brush, and ink, 13 x 17.1 cm, The Pierpont Morgan Library, New York. I, 180.


Here is a link to Chapter 1, "Gestural Expression," from Nathan Goldstein, The Art of Responsive Drawing. 

The link will direct you to the blue drive.

The username and password are the same as your UW-Stout email.

Click here to get the chapter.

25 January 2010

spring 2010 syllabus (ART 301-001 and ART 301-002)

Life Drawing I • Spring 2010
Applied Arts 303


ART 301-001
Monday/Wednesday • 2:30 – 5:35 pm
ART 301-002
Tuesday/Thursday • 11:15 – 2:20 pm


Amy Fichter
Associate Professor
Applied Arts 306B

Office hours:
Fridays, 11:00 am – 1:00 pm
& by appointment
ext. 5335

PreRequisites
Students must have completed Drawing I (ART 100) and Drawing II (ART 200) before participating in Life Drawing I (ART 301).

Course Objectives
Through participation in Life Drawing I, you will:

1) Understand and use a structural approach to drawing
  • Perceive three-dimensional form and translate this form to the two-dimensional picture plane
  • Comprehend a subject’s planar make-up and correctly prioritize primary and secondary planes
  • Use a linear, as opposed to painterly, approach to drawing the figure, including value

2) Develop a working knowledge of artistic anatomy through lectures, drawings, and clay modeling
  • Draw a structural representation of the human figure utilizing long axis, cross contour, and muscle attachment lines
  • Demonstrate anatomical understanding through drawing anatomical landmarks
  • Build a convincing and well-crafted clay model of the muscles important for drawing

3) Refine your mark-making skills and ability to make and understand how line creates a sense of space on the picture plane.
  • Practice gesture drawing and contour drawing separately, in order to achieve a synthesis of the two
  • Become aware of your own kinesthetic sense and its ability to teach yourself about the body and drawing

4) Communicate effectively about the drawing process via writing, blog posting, image sharing, class critiques, and one-on-one critiques with the instructor.
  • Keep a class blog that will serve as space for posting images, text, responding to other students, and reflecting upon your learning in the course
  • Be responsible to yourself and the other students in the class for having meaningful class discussions and becoming better artists through those discussions

Evaluations & Expectations
I expect you to complete:
  • In-class drawings. (30%)
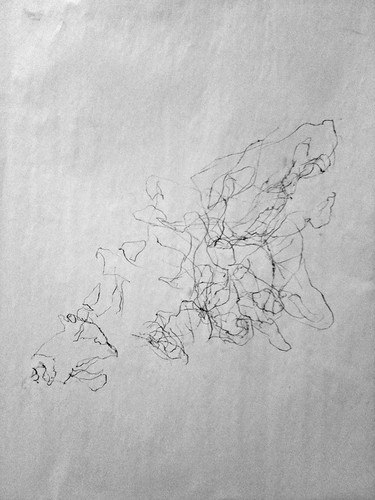
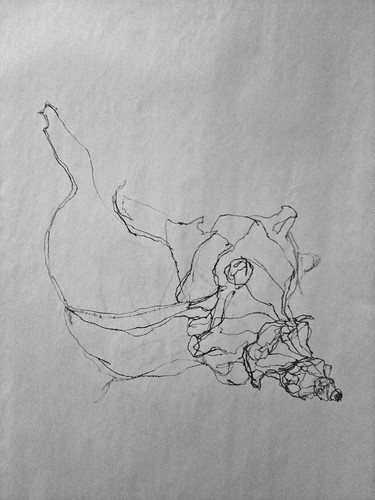
  • Homework drawings (Shells). Homework will be graded on the quality of the drawing and the demonstrated understanding of the topics covered in that particular assignment. This includes the final homework assignment (self-portrait). (25%)
  • Assigned clay building on your Maniken, both in-class and for homework. Maniken assignments will be graded on the quality of clay building, accuracy of form and attachments, and completeness of work. (25%)
  • Blog assignments/weekly reflections. (20%)

Field Trip
There is a mandatory field trip for this class. The date is set for Wednesday, February 24. You must make arrangements with other professors and/or work obligations to be gone from 8:00 am - 5:30 pm on this day. Please email me the names and email addresses of other professors you have on that day and I will send a note for you. I can also give a hand-written note if necessary. I am planning a trip for us to visit the Bell Museum of National History on the University of Minnesota campus and the Walker Art Center. The only cost of the field trip for you will be food.

Attendance
It’s important that you are in class—for access to the model, to hear comments I make, and to experience drawing in a studio setting. The class happens because all of you are here working together.
Let me know via e-mail if you can’t make it to class.
Rely on your classmates to show you drawings and notes you may have missed.
After 3 absences, your grade may be lowered.
After 7 absences, you may fail the class.

Grading Policy
• Your grade will be based primarily on your final e-portfolio in which you showcase your learning over the semester and best examples from the class. This e-portfolio will include in-class drawings (gesture drawings and long-pose drawings), homework drawings, maniken work, and blog reflections. This portfolio will consist of a blog summary with a link to a flickr or photobucket account that includes a larger set of images (drawings, maniken photos) from the semester.

• A mid-term e-portfolio will be graded to give you an idea of your standing in the class at that point, but may be overridden by the quality of your final portfolio. In other words, the two grades will not be “averaged” for your final grade.

• Your grade will also be affected by such “subjective” qualities as these:
1. Are you present?
2. In mind as well as body?
3. Open to suggestions?
4. Helpful in class discussions?
5. Awake during lecture time?

It is part of my job—my responsibility—to give you a grade that lets you and other art “authorities” (other professors, employers, grad schools, gallery owners, etc.) know how your final portfolio and overall attitude during class measure up to given standards.

One useful way to think about grades is to consider them guides as to how other art professionals (besides me) would view your portfolio. How would a design firm see your work? A graduate school acceptance committee? Other professors in the Art & Design department? Gallery owners?

If I imagine I am an employer of designers, an A would mean you could start right away, a B would mean you might get hired if you get some more experience and refine your portfolio, a C would mean you are not ready for the job.

Likewise, if you are considering graduate school, an A would mean your work is of the quality that would get you accepted into a grad program, a B would indicate that you might get accepted if you worked on your portfolio some more, a C would mean you are not ready to apply for graduate studies (in Drawing/Life Drawing, anyway).

Save and document all your drawings from the semester.

Materials
Newsprint 18" x 24" or 24” x 36”
Canson "Biggie" white drawing paper (Biggie pad) 18” x 24” or larger
Drawing board
Clips
Charcoal
Charcoal pencils
Conte
Conte pencils
X-acto knife
Sandpaper
Pencil sharpener
White plastic eraser
Clic eraser (refillable)
Masking tape
Clay tools


For shell drawings, beginning Wednesday, February 17:
22” x 30” Stonehenge or similar high-quality drawing paper (minimum 4 sheets)
masking tape
ink (india ink, black, brown, sepia, red, etc.)
bamboo brush
varnish brush
cups for ink and water


Atlas of Human Musculature in Clay (volumes 1 – 5), Jon Zahourek, ed. Kenneth Morgareidge, Zahourek Systems, Inc., 1994.

In addition to the texts, each student will be checked out a half Maniken for his/her use during the semester. The Manikens are property of UW-Stout Instructional Resources Services. You are responsible for the Maniken checked out to you. If any part of the Maniken is missing, lost, damaged, etc., the student will be financially responsible to replace it through IRS.


Videos
World Famous Lectures on Artistic Anatomy & Figure Drawing
Robert Beverly Hale

Lecture 1 Rib Cage 78 Minutes
Lecture 2 Pelvis 81 minutes
Lecture 3 Leg 74 minutes
Lecture 4 Foot 72 minutes
Lecture 5 Shoulder Girdle I 77 minutes
Lecture 6 Shoulder Girdle ll 68 minutes
Lecture 7 Arm 76 minutes
Lecture 8 Hand 80 minutes
Lecture 9 Head/Skull 80 minutes
Lecture 10 Head and Features 97 minutes

These are available for checkout in the library.

Art Education Artifacts
The course objectives of this course meet:
• Wisconsin Standard 1: The teacher understands the central concepts, tools of inquiry, and structures of the discipline(s) he or she teaches.
• UW Stout School of Education Domain 1a: Demonstrating knowledge of content and pedagogy.
• Wisconsin Standard 9: The teacher is a reflective practitioner.
Portfolio Artifact: best work as determined by student and professor
• Art education students will be required to reflect in writing on this artifact.
• Art education students will be required to upload papers and digital images of their studio works into their e-portfolios.

RSS Subscribe